 Réalisation - thermostatic radiator valve simulator
Etape 1
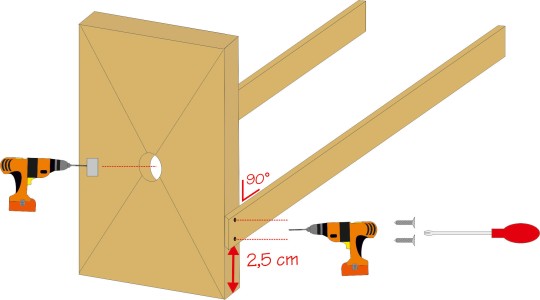
Draw a cross on the larger wood board. Drill a hole in the center with a 25mm cookie cutter.
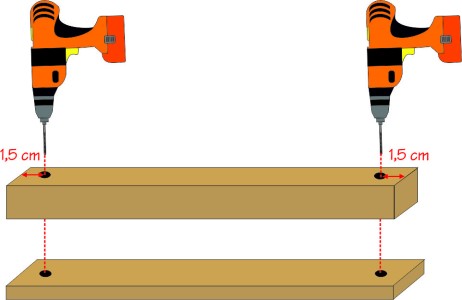
Measure/mark 2.5cm from the bottom of each side of the large wood board.
Drill and screw the 25cm wood strips onto the sides of the board. Check if it's at right angle before screwing in the second screw.
Etape 3
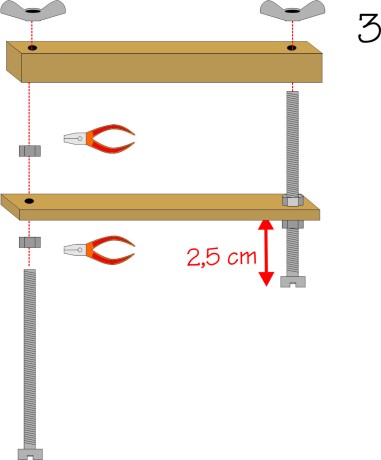
Place one nut on each long screw. Push down until the nut is 2.5cm from the screw head.
Place the flat list on both screws then add a nut.
While holding the bottom nut (on the screw head side), tighten the top nut.
Check that the distance is still 2.5cm. Pass the square list over the two screws, then add a wing nut on each side.
Etape 7
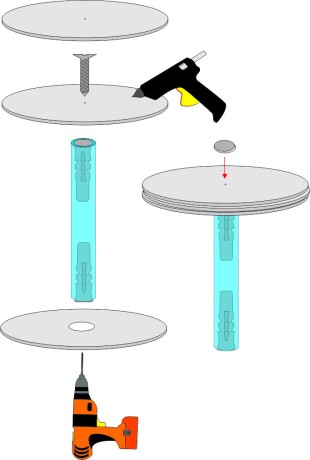
A l’aide d’un compas, dessiner sur le carton 3 cercles de 6cm de diamètre.
Découper précisément les cercles avec une paire de ciseaux et percer le centre d’un des cercles avec une mèche de 8mm.
Visser un premier cercle sur la paille.
Du même côté coller à la colle chaude un autre cercle par-dessus.
Coller l’aimant au centre.De l’autre côté passer le cercle troué sur la paille et le coller sur les deux autres cercles avec de la colle chaude.
Etape 8
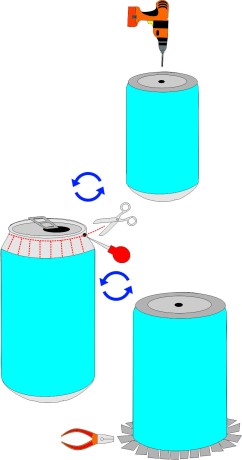
Pass the “piston” (straw forward) through the can. Use a screwdriver to push the straw through the hole.
Check that the “piston” moves freely in the can.Cut a 2.5 cm long piece of skewer.
Glue it to the wooden pearl with hot glue, leaving about 1cm coming out on one side.
Press and glue the skewer end into the straw using hot glue.
Cover the entire surface of the wooden pearl with watertight Teflon tape.

 |  |  |  |  |  |  |  |  |


